
Kimchi with Smoked Bacon and Eggs Recipe
Kimchi with crispy bits of hickory smoked bacon and eggs is a delectable meal that offers comfort and a punch of flavor. This easy recipe is perfect for anyone who enjoys the combination of spicy kimchi, savory bacon, and creamy yolks.
I am not saying that my whole family loves this meal, but my husband and I enjoy this flavor-bomb dish very much. If you love kimchi, I hope you will love this meal as much as we do!

🍽️ Why You’ll Love This Recipe:
✅ Super Delicious: The combination of kimchi, bacon, and eggs creates a symphony of flavors that will tantalize your taste buds.
✅ Comforting: The hearty and nourishing combination of kimchi, bacon, and eggs is perfect for a comforting meal anytime.
✅ Easy to Make: This dish comes together effortlessly, making it a go-to meal for busy individuals.
✅ Keto-Friendly: This dish is perfect for individuals following a ketogenic or paleo diet, as it is low-carb and high in protein.
✅ ** Versatile**: Serve it as a hearty breakfast, brunch, or even an early dinner, accompanied by rice or on its own.

Kimchi with crispy bits of hickory smoked bacon and eggs is a meal in itself, combining comfort, deliciousness, and ease of preparation.
Whether you’re a kimchi lover or simply looking for a mouthwatering meal, this dish will satisfy your cravings. So, gather your ingredients and give it a try today!
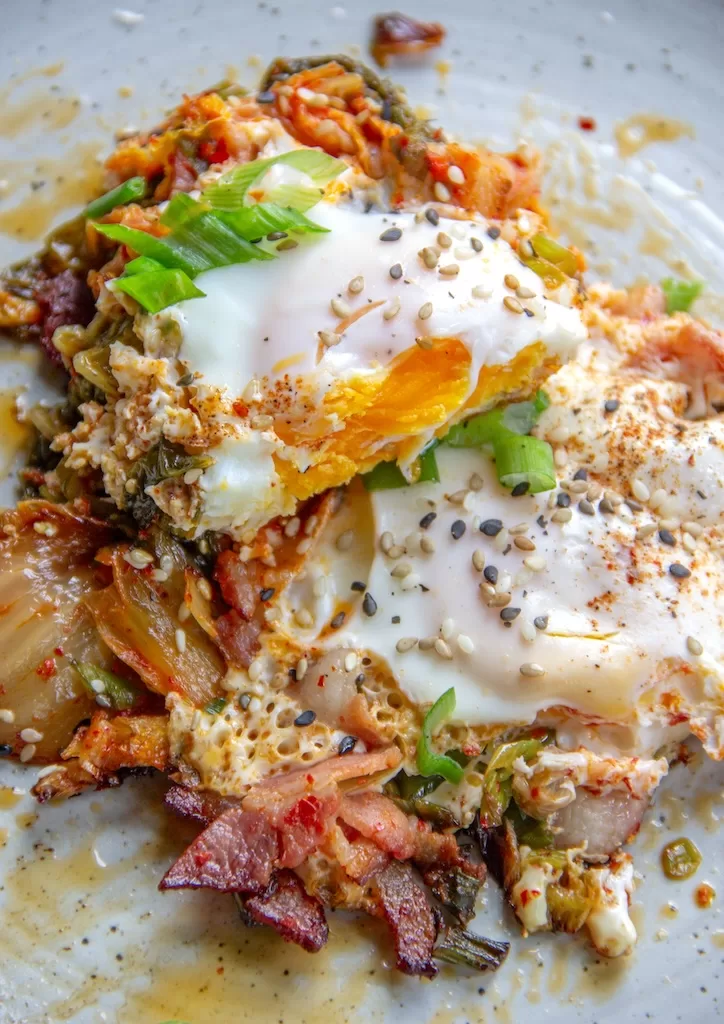
If you make this yummy Kimchi with Smoked Bacon and Eggs, please share on social media and tag me @sandraseasycooking
Thank you so much for your love and continued support!
Happy Cooking!
Recipes you might like:
Potatoes and Eggs Skillet
Bacon Eggs and Cheese Croissant Sandwiches
Kimchi Fried Rice


Kimchi with Smoked Bacon and Eggs
Simple and Easy Recipe for Kimchi with Smoked Bacon and Eggs
Ingredients
- 1 cup of chopped Cabbage Kimchi: the amount may vary depending on personal preference
- 4 slices Hickory Smoked Bacon, crispy bits preferred
- 4 large Eggs
- Salt and pepper to taste
Instructions
- Heat a pan over medium heat and cook the bacon until crispy.
- Remove the bacon from the pan and set aside, leaving the bacon grease in the pan.
- Add the kimchi to the pan and cook until slightly softened. Add half of the crispy bacon bits to the kimchi.
- Crack the eggs into the pan, add a sprinkle of salt and pepper, cover turn down the temp, and gently cook to your liking. 5 minutes or until egg whites are thoroughly cooked and egg yolks look creamy inside. However, this is personal. Leave it under the lid for 4 to 5 minutes if you like its harder yolk. Turn off the stove so the eggs cook, but do not burn.
- Add the rest of the crispy bacon bits to the kimchi and eggs.
- Serve the kimchi with crispy bits of hickory smoked bacon and eggs immediately, garnished with additional herbs or spices, sesame seeds, and chopped green onion, if desired.
Notes
🌟 Tips and Variations:
- If you prefer a milder flavor, reduce the kimchi used.
- Feel free to experiment with different varieties of kimchi for added flavor.
- Add a soy sauce or hot sauce splash to kick up the spiciness.
- Top the kimchi with sliced beef or chicken for a protein-packed meal, or omit meat if you are vegetarian. However, make sure to get Vegan Kimchi.
- Serve with rice or crusty bread to soak up all the delicious flavors.
Nutrition Information
Yield
2Serving Size
1Amount Per Serving Calories 268Total Fat 18gSaturated Fat 6gTrans Fat 0gUnsaturated Fat 11gCholesterol 395mgSodium 683mgCarbohydrates 5gNet Carbohydrates 4gFiber 1gSugar 2gProtein 21g
This data was provided and calculated by Nutritionix. Nutrition information isn’t always accurate, but we try our best.
