
I might be just a few years late for the Hokkaido bread craziness that got into the food blogging community. However, better late than never.
Well, I had a chance to taste many Asian pastries and bread. We have a few great markets with bakeries that carry many baked and fried goodies.
I consider that a plus for me. If you never had Asian sweets, pastries or bread you are missing a lot.
Oh, I cannot even tell you how delicious Japanese curry bread (kare pan) or doughnut. My favorite, Anpan, sweet bread roll filled with sweet red bean paste, which I ate two weeks ago.
It was ever so soft, fresh and in combination with my hot french vanilla latte. It was just perfect on a chilly afternoon.
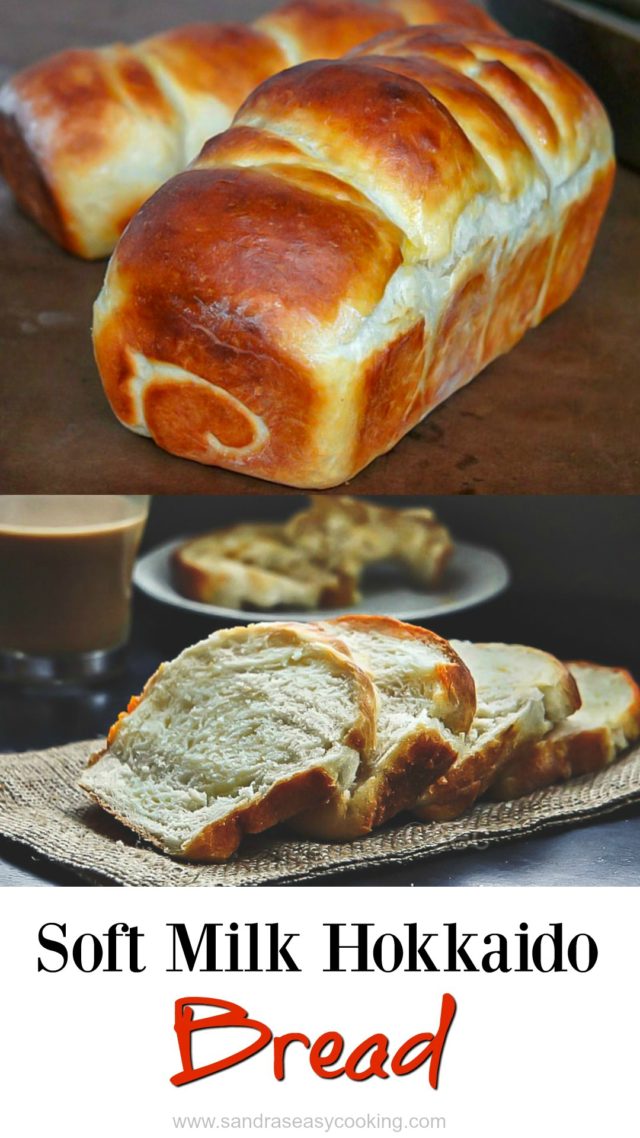
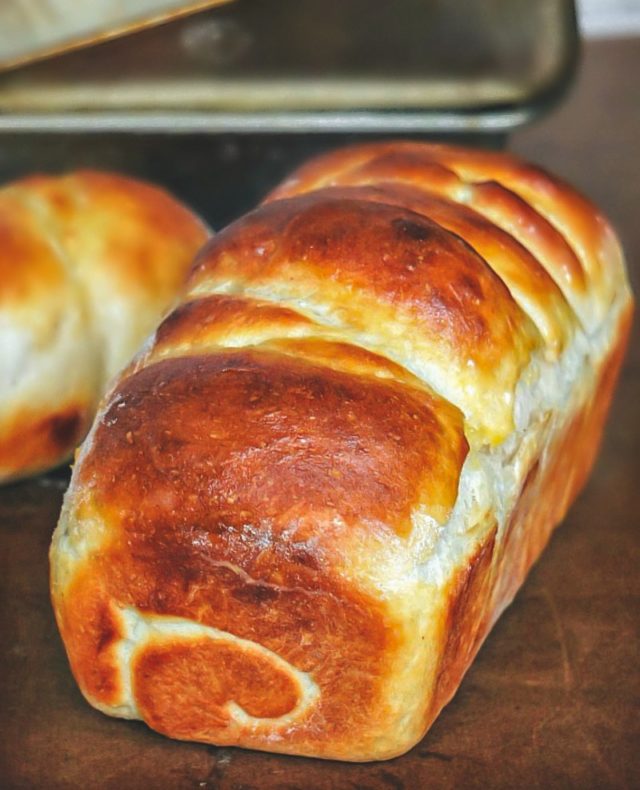
One of those bread that I went head over heels in this soft, fluffy like a pillow Japanese milk bread that literally melts in your mouth.

What is Hokkaido?
Hokkaido (formerly known as Ezo, Yezo, Yeso) is the second largest island out of four in Japan.
Since this bread is called Hokkaido bread toast I am assuming its origin is from that area.
I tried to dig deeper to find at least some history behind the bread but there was nothing in particular in the history part, other than million recipes and most of them linked to Mrs. Christine of Christine Recipes.
Some believe this bread is originated in Tokyo, but milk as a main part of the bread is from Hokkaido. That is why it is called Hokkaido Milk Bread. Interesting fact, right?
So I modified it, change some things, used less butter but you are more than welcome to check this link above and see how she did it.
Bread came out so delicious, and simply amazing, my friends. I made this milk bread 4 times this week.
My dear niece loved the bread so I send her some, and you wouldn’t believe but my little baby boy ate one loaf in a day. Needless to say, my family really love and enjoy this bread, and we hope you will too.
Interesting article or a post about bread making techniques CLICK HERE
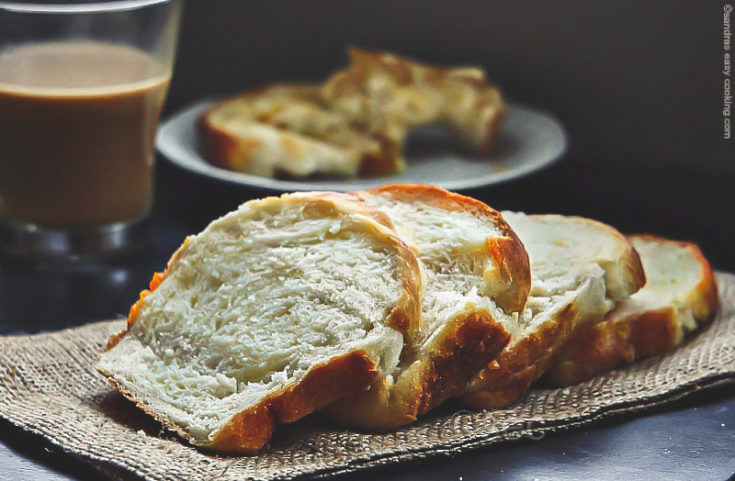
Soft Milk Hokkaido Bread
I went head over heels in this soft, fluffy like a pillow Japanese milk bread that literally melts in your mouth. This Bread was so soft, fresh and in combination with my hot french vanilla latte, it was just perfect on a chilly afternoon.
Ingredients
- 2 cups all-purpose flour
- 2 Tbs. Sugar
- 1.5 tsp. Salt (1 1/2)
- 2 tsp. Organic Dry milk Powder
- 1 Tbsp. Dry yeast + 5 Tbs. warm Milk
- 1-2 eggs, lightly beaten
- 2 oz Whipping cream
- 2 oz Milk
- 1 cup Tangzhong (flour+water roux), enough for two loaves
- 2 Tbs. unsalted butter, melted
- 1 tsp. Oil
Tangzhong /flour+water roux:
- 1/3 cup bread flour
- 1 cup of water
Instructions
- First, make "tangzhong" or flour+water roux. In a medium saucepan, add 1 cup of warm water, and turn the heat on medium-low. Add Flour to the water and stir, let it heat through; stir until it becomes smooth texture, try not to burn and mash if you see lumps of dough. Suggestion* Once it starts to come together, getting thicker, turn off the heat and stir on the hot surface until you reach nicely thick constancy. Set aside.
- Next, you will put together and mix all dry ingredients in the large bowl, except yeast. Put yeast in glass or cup with warm milk and sprinkle with sugar, let the yeast get activated (let it sit for 3-5 minutes). If it's still active, it will start to bubble and rise.
- Add activated yeast and roux in the dry ingredients; mix together all wet ingredients as well as egg/s, and start mixing with wooden spoon until slightly combined. It will be sticky.
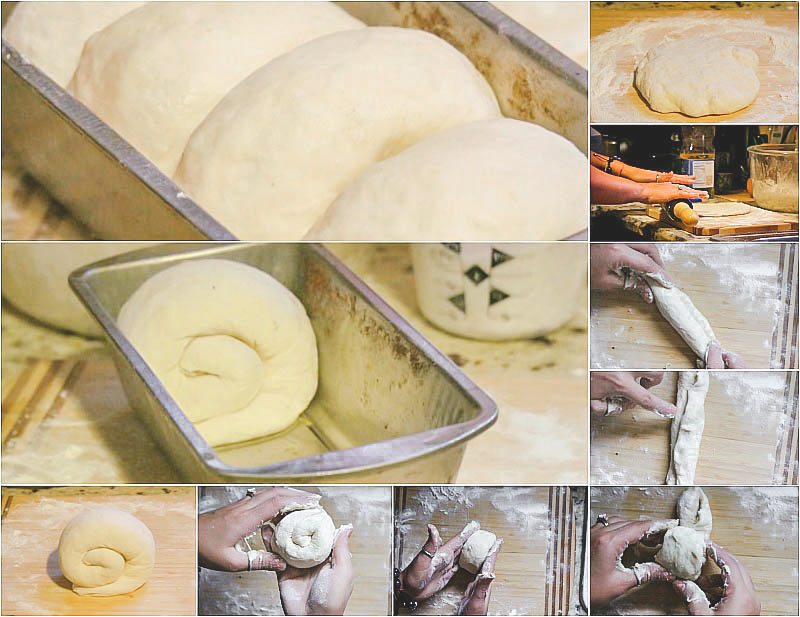
- Toss a handful of flour on the Kitchen Counter/working surface and put the dough on it, knead until it looks like a ball.
- Put it back in the bowl, brush oil on the dough, cover the bowl with the plastic wrap, put in the warm area, HINT * turned off oven or microwave is a perfect place to keep your dough until it raises because of there no cold air flow.
- Let the dough rise for full 60 minutes, then take it out the bowl and onto a flour dusted cutting board, cut into 4 or more balls, depending on how big is your baking pan. I could bake only 4 in one pan, so I used two for 8 rolls, which I packed 4 at the time (See pic above for further instructions.)
- Preheat the oven to 375 F.
- Once all the rolls are done, and in the baking pan, about additional 30 minutes. Brush on mix of one egg and pinch of salt or unsalted melted butter.
- Bake for 40 minutes or until it is golden brown, and when you pick up the pan it's not as heavy.
- Take it out of the baking pan, and wrap the bread with clean kitchen cloth/towel, and do not cut until it cools for at least 30 minutes, preferably an hour.
Notes
You can make rolls in the regular circular pan and so much more. Click here for more inspiration and great ideas that I found on Google Images.
Make sure to wrap the bread really good once it's completely cooled, either by placing it in the large Ziploc bag or wrap it with plastic wrap.