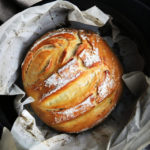
DUTCH OVEN BREAD
Homemade Dutch Oven Bread is simple and very delicious.
Ingredients
- 1/2 cup warm milk
- 1/4 teaspoon sugar
- 1 pack dry active yeast
- 4 cups All-Purpose Flour
- 3/4 tablespoon Salt
- 1 cup Lukewarm water add a splash extra if needed
- 1 egg mixed
- 1 tablespoon Olive Oil
Instructions
-
Stir yeast packet into a warm to touch milk and sugar, and allow yeast to bloom for about 5 minutes. When it starts to bubble and foam it means the yeast is active and ready to be used.
-
In a large bowl, mix together flour and salt, then create a small well in the middle and pour in the milk and yeast mixture.
-
Mix one egg with warm water to warm up cold egg, and add to the flour.
-
Using your wooden spoon or spatula, start combining everything. Once combined using your hands, start to knead the dough, when it starts to pull away from the sides of the bowl it is ready to rest. I knead for about 5 minutes. If the dough is too sticky, add more flour, a couple of tablespoons at a time and vice versa, add a splash more water if it's too dry. Drizzle olive oil and tap/glaze all over the dough.
-
Cover the bowl with a large kitchen towel and let it rise until it doubles in size. It takes about 2 hours, sometimes less if the house is warmer.
-
Uncover the dough and give it a few pokes with your finger. If the dough has risen properly it should indent under the pressure of your fingers and slowly deflate.
-
Using your hand fold the dough. Light pressure-kneading. Add more flour until it comes together. Cover and let it rise for one more hour. You may leave it for up to 3 hours.
-
Preheat the oven to 450˚F
-
Once the dough has doubled in size one more time, knead it again just to shape it.
-
Line the dutch oven with a large parchment paper and place your dough in the middle. Sprinkle the top with a bit of flour and score lines on top. It's not necessary but it looks better. As the bread bakes, it will expand and those scored lines will become more visible.
-
Bake for about 45 to 50 minutes, removing the lid completely 10 minutes before the bread is done. This way it will get a deeper color and crispier.
-
Remove bread from a dutch oven, wrap it in the kitchen towel and let it cool for at least 30 minutes before slicing. Trust me on this one. If you cut it when the bread is hot it will become sticky inside so better wait for just a bit.
Recipe Notes
You may skip the egg.
You may use water instead of the milk.
The outcome of the bread depends on the water temperature, oven, flour, yeast even air. This recipe is tested and retested many times.
You may preheat your dutch oven or you can actually make it in the regular baking pan. You don't have to use parchment paper, but I like using it.
Don't stop baking if the bread does not come out perfect the first time... like I said it could be many different things to affect it.
[amazon_link asins='B077TVRF5T,B000LRFVHE,B0766FGWM5,B07F6F631N' template='ProductGrid' store='welcosblog00b-20' marketplace='US' link_id='a7b8545d-21e1-4cf8-bb35-128450ec2b46'][amazon_link asins='B00LGLHUA0,B003OXNBYC,B004A15870' template='ProductGrid' store='welcosblog00b-20' marketplace='US' link_id='49156201-2b9b-4d66-81ed-88ab0e3922d6']
[amazon_link asins='B01M70U0FX' template='ProductGrid' store='welcosblog00b-20' marketplace='US' link_id='aedfc9c3-8dc8-480b-b653-6f8fcd2c484c']