
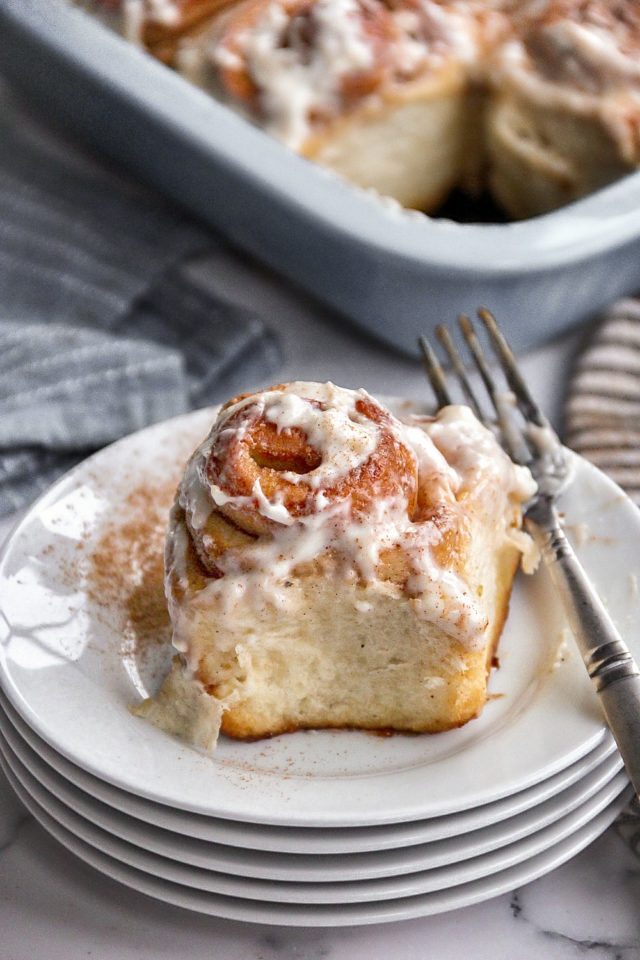
What do we have here? Yes, I have The Best Cinnamon Rolls for you all. They are so fluffy, tasty, sweet and comforting.
I have made these almost every other day until I got the best measurements. My family loves these rolls, but they are quite dangerous.
I do not think, my friends, that I will make these for the next 6 months. I am not sick of them, but I just cannot resist eating them.
They are quite good for the soul and a perfect breakfast or brunch food. Oh, bring them to your friend’s house or make an edible gift for your neighbors.
Everyone loves cinnamon rolls!
Tap here for more tasty sweet breakfast ideas
So, you might ask what is the difference between my cinnamon rolls and all the other that you may find online?
Well, this recipe will not fail you. I am almost one thousand percent sure.
I really tried the best I could to simplify this recipe and there is no other way around it.
With that being said, you may knead the dough with your hands. Yes!
I have made these rolls plenty of time before with my hands. You really do not need a stand mixer, however, it is always a plus.
There is something rather therapeutic when you knead dough especially if you are under stress or have a hard day.
Also, you might like adding other things with traditional butter, brown sugar and cinnamon.
We love adding raisins as well as nuts. It is so good, but then it reminds me really of a sticky bun more than cinnamon rolls. Does that sound weird?
Well, we just going to start with traditional cinnamon rolls and then move up and experiment with different fillings and flavors.
Once you know how to make dough everything else is really easy. Always start and learn basic, then experiment.
For example, my husband loves regular icing; sugar and heavy whipped cream. I love more with cream cheese. I make both just because my kids like them both ways.
Well, either way, I hope you try baking The Best Cinnamon Rolls. Trust me, you won’t be sorry! This dough is the best.
If you do make them, please tag me on social media or Instagram. @sandraseasycooking using hashtag #sandraseasycooking.
Thank you so much for all your love and support! Let’s start this year on a sweet note! Happy Baking!

The Best Cinnamon Rolls
The Best Cinnamon Rolls
Ingredients
Starter
- 1 pack dried yeast (1/4 oz)
- 1 teaspoon sugar
- 1/2 cup milk, warm to the touch (118ml)
Dough
- 4 cups all-purpose flour (500g/1 lb), plus a few tablespoons more for dusting working area
- 1/2 teaspoon salt
- 1/4 cup granulated sugar
- 2 large eggs, well beaten
- 3/4 cup water (177ml)
- 2 tablespoons softened unsalted butter
- 1 tablespoon oil, plus for greasing bowl for the dough
Filling
- 1 cup brown sugar
- 3/4 stick softened unsalted butter + 1 teaspoon for buttering the baking pan
- 2 tablespoons cinnamon
Classic Icing
- 2 tablespoons heavy whipped cream
- 1/4 cup powdered sugar, more if needed
- 1 teaspoon cinnamon
Cream Cheese Icing Option
- 1 block cream cheese (Philadelphia), room temperature
- 2 tablespoons unsalted butter
- 1 tablespoon milk
- 1/4 cup powdered sugar
- 1 teaspoon vanilla extract
- 1 teaspoon cinnamon
Instructions
Activate Yeast
- It's not necessary if you have instant dry yeast, but I like to do it. So warm up milk for about 20 seconds in the microwave-safe bowl or a cup until warm to the touch, then add sugar and dried yeast.
- Mix and allow the yeast to start to bubble.
- When you see yeast get bubbly and thicken on the top it is ready. It usually takes about 2-3 minutes, depending on the temperature. Never use hot milk or water.
Prep Dough
- Measure and combine flour, salt, and sugar. Mix it.
- Place everything in the stand-up mixer bowl.
- Make a small well in the middle and add activated yeast.
- Using the kneading attachment of your mixer start mixing slowly while adding 2 mixed or beaten eggs, room temperature/soften butter, and water mixed with oil.
- Adjust the mixer to a higher speed and keep kneading for about 3-4 minutes or until the dough is becoming a ball and pulling away from the sides of the mixer bowl.
- Do not overmix, there is no need. The dough will be softer to the touch.
- Transfer dough to a well-oiled larger bowl and cover. Place dough either in the oven or microwave so it could rise. If your oven has a proof setting this is a perfect time to use it, if not just keep it in the turned-off oven. Allow it to rise for the first time for about 45 minutes.
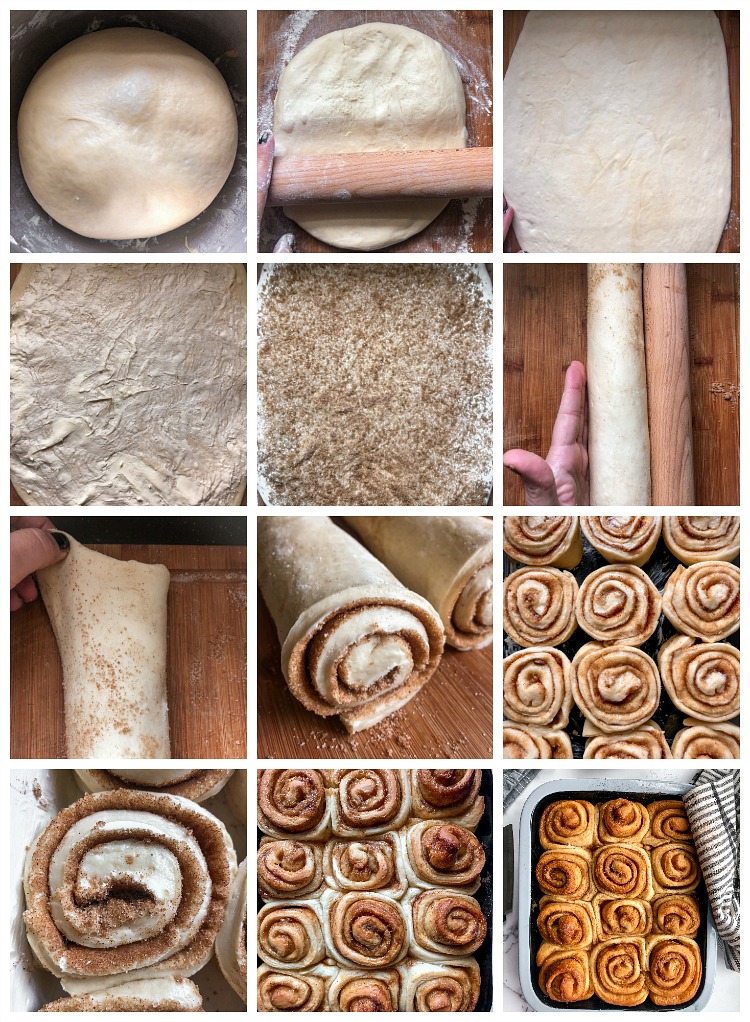
- It will double in size. Knead, then allow it to second proof for another 45 minutes, knead, cover, and place in the fridge for about 6-8 hrs/overnight before making rolls.
- You do not have to chill the dough however they do come out so much better, plus it is easier to roll out. After chilling let it sit at room temperature for about 10 minutes before rolling out.
Filling
- Roll out dough to (0.635cm) 1/4 inch thick. The size is approximately (38cm) 15 inches wide and (53cm) 21 inches long.
- Spread room temperature butter from one end to the other evenly. You can slightly soften it in the microwave if it's not at room temperature.
- It would hard to spread if it is not. On top of the butter, add brown sugar and press in the dough a bit, then add cinnamon. If you like raisins or a sprinkle of crushed nuts this would be a good time to add. Make sure to soak raisins ahead.
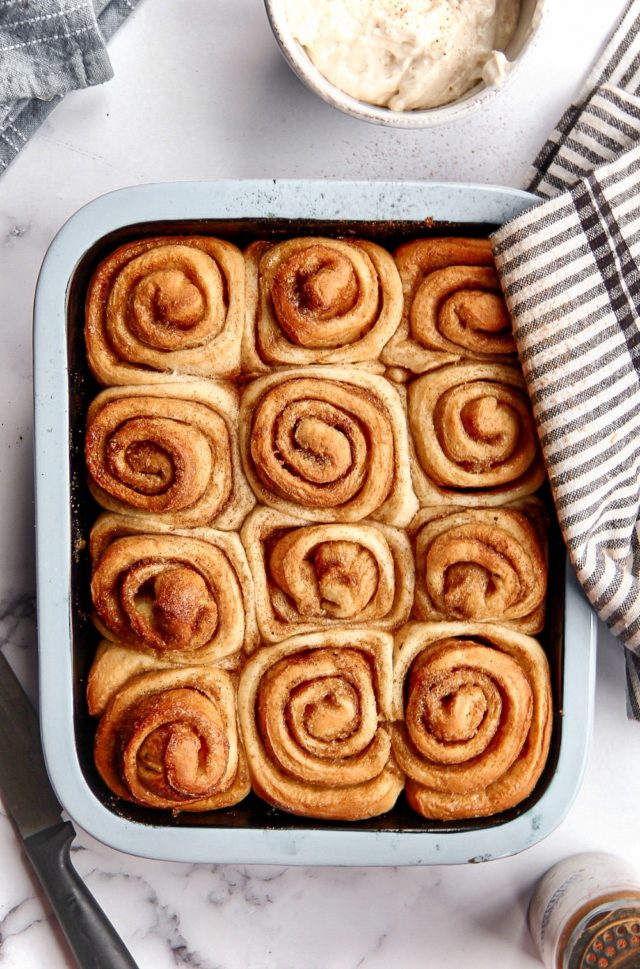
- Slowly roll the dough until you reach the end. Pull ends to have an even end. Slice it in half, then cut the cylinder into 12 to 14 equal slices.
- Place cut side up and evenly spaced 9 x 13-inch baking dish.
- Cover the pan with plastic wrap and set aside in a warm place to let rise for at least 30 minutes to one hour.
Baking
- Preheat oven to 350F and bake them for 30 minutes. This also depends on your oven, and baking dish.
If you are baking in the ceramic dish like I did, then bake at a lower temperature, I would do the same if you choose to bake it in cast iron, however, for a regular metal baking dish I would go to 375F and bake for about 25 minutes or until they are nicely golden brown.
Icing
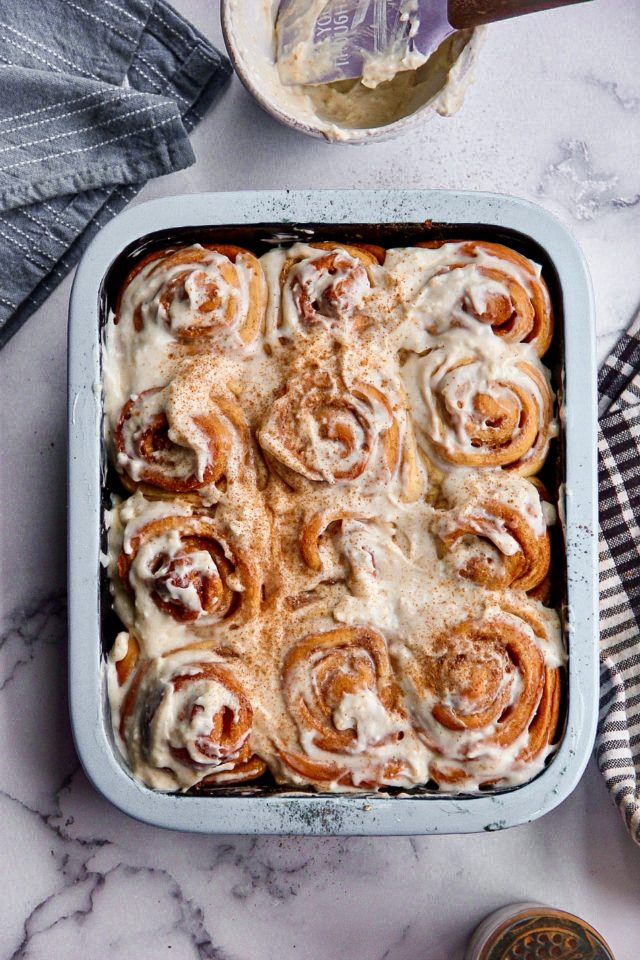
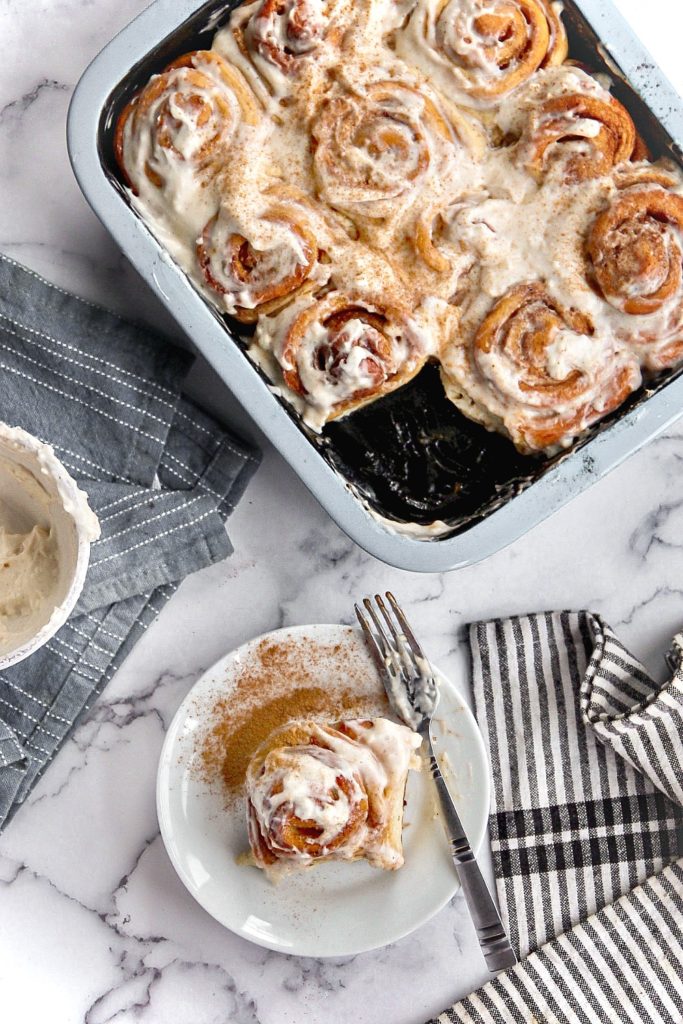
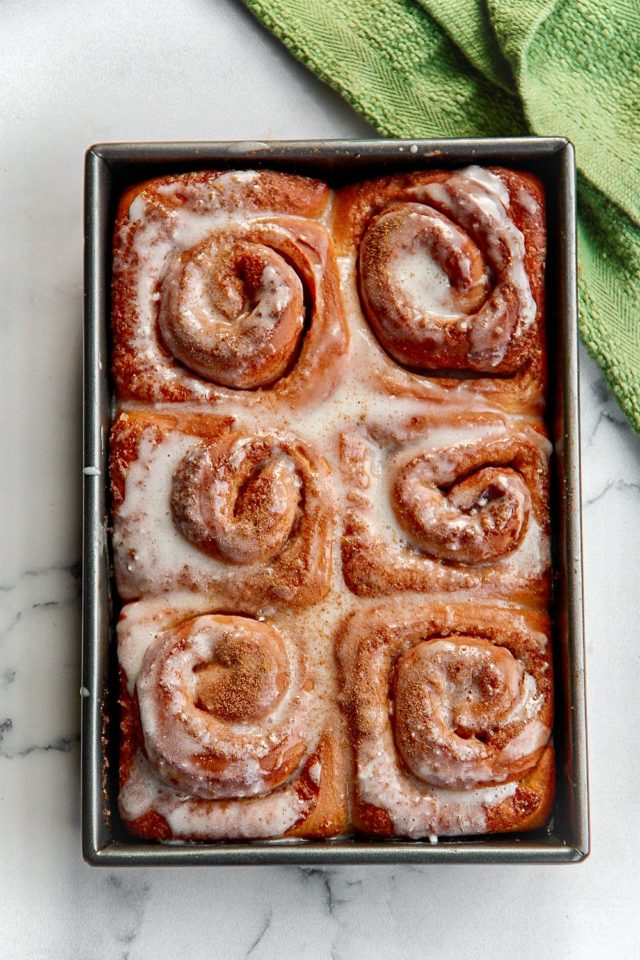
- While the rolls are baking make the icing. I like it with a cream cheese-based, so you would just mix it until nicely blended.
- For regular sugar-based, whisk together the cream, sugar, and cinnamon in a small bowl until smooth.
Transfer the pan of cinnamon rolls to a cooling rack. Let cool for at least 5 minutes. Drizzle or spread the icing all over the rolls and serve immediately.
Notes
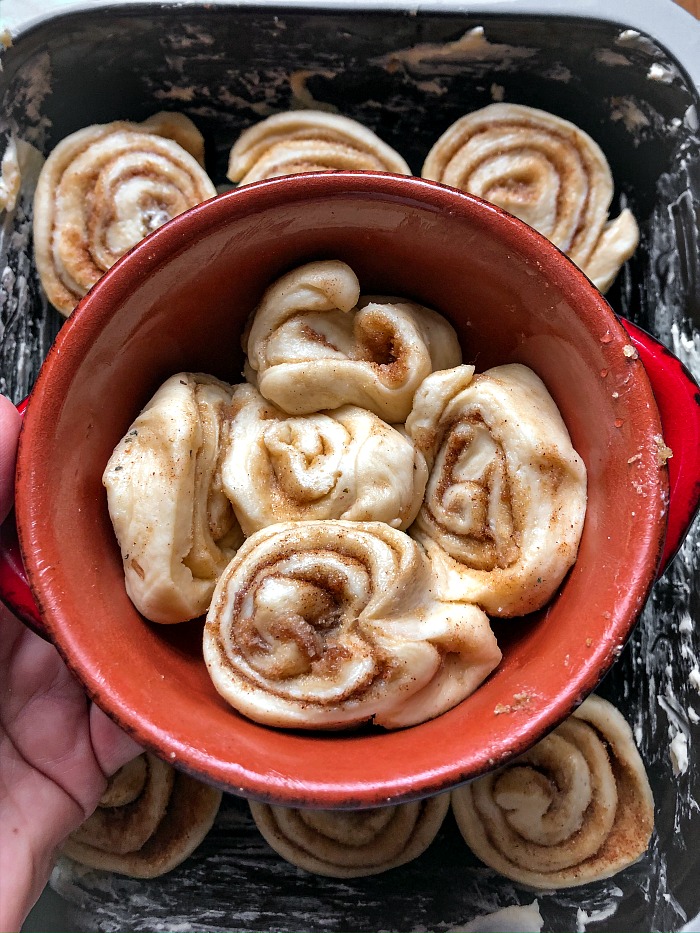
Scraps aka leftover ends I place in the bigger ramekins and bake them as well. Nothing will be wasted!
Scraps aka leftover ends taste just as good!
Thanksgiving Side Dishes - Sandra's Easy Cooking
Thursday 18th of November 2021
[…] The Best Cinnamon Rolls […]
Banana Nut Oat Muffins - Sandra's Easy Cooking Breakfast and Brunch
Wednesday 25th of March 2020
[…] THE BEST CINNAMON ROLLS […]
Nutella Rolls - Sandra's Easy Cooking Breakfast and Brunch Recipes
Friday 20th of March 2020
[…] I must say that my cinnamon rolls are pretty amazing too, so hop over and grab a very similar recipe to this […]
Cheese Stuffed Dinner Rolls - Sandra's Easy Cooking Bread and Rolls
Thursday 13th of February 2020
[…] THE BEST CINNAMON ROLLS […]